Monday, May 30, 2011

REAL PEOPLE REAL ANSWERS EDITION 4


A DAY IN THE LIFE
“Living Naturally You”
Real People Real Answers


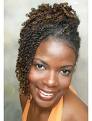
1. What’s your name?  Sesily S. Coleman

2. How old are you?  36 years young :-)

3. Where are you from? I'm a proud native of New Orleans, LA, but I'm a ten year resident of Atlanta, GA

4. What is your occupation?  I'm the founder of The TechEd Consultant, a educational technology company that provides professional development training to both school systems across the country.

5. How would you describe yourself? I'm a hurdler because I can jump over any obstacle that's set in my race...

6. When did you first decide to become natural?  I was a natural all through college, but decided to BC again last year (May 2010).  It's been 1 year of growth (for my hair and for my spirit).

7. If there was one word to describe your style what would it be?   ECLECTIC

8. Who are some people that inspire you the most?  My husband (who will forever be my rock), my children, my very supportive parents, and my very encouraging siblings.

9. What do you want to be when you grow up?  Seeing that I'm 37, I think I'm pretty grown up already!  lol!  I'm actually living my dream of being a devoted mommie and a black female business owner :-)

10. What advice would you give to others who wanted to go natural or live a more natural based lifestyle?  
The best advice I can offer is to be true to yourself, no matter what trends or fads the world manages to produce and present to you.  Embrace God's blessings for you life and continue to look to other positive people for inspiration in your life.  Always find the time to pamper yourself because we all deserve that moment of comfort.  God blessed black women with the type of hair that can be manipulated to make us always stand out in ANY crowd...embrace that!


11. What’s your favorite quote?
   "Whatever it is...let it be".  - Jill Scott


Umm yeah did I mention this was some serious HAIR ENVY!!!!


Braiding Methods Part Two : Adding on the Add on

Braiding Methods Part 2: Adding on the Add on


Now that you have mastered the art of basic braiding ...We can move along the some fun protective styling with adding on the add on. There are many variations of these basic ideas but today I am going to go over a few of my favorite basic add on braiding techniques: Rope braiding with add on and French Braiding with add on. Of course there are so many more methods of using basic braiding techniques that go beyond the scope of this article. Look forward to my future postings to have in depth explanations of even more braiding techniques.

Rope Braiding with Add on


First pick your favorite add on synthetic or human hair and separate it into several equal chunks, each about one half of the size of the full size braid you would like to have . You will need u to two packs of human hair and up to five packs of synthetic depending on the variation of your client's head. Now part the client's scalp with your desired method about the size of the braid you want to have in the end and take the hair and spit into two. Take two of the pre separated pieces of human hair or synthetic hair and cross over like an "X". Attach at the base of the scalp with three fingers in a space of the "X" you made and the part you made int the client's scalp. Now split the hair into three sections. Hold two sections in your right hand ad the last section in your left. Cross the right section over the top of the middle section( while stile keeping a grip on the middle section with your right hand) and this will become your new left end . Repeat this process for the left end ( cross over to the right as this will become your new right piece). Keep crossing over the side pieces towards the middle until you reach the end of your newly created braid. Repeat this process over the entire head.

Special note 1: To end your braids for micros you may glue the hair( Human or synthetic) at the end of the braid that you made and have the rest of the hair free flowing..or you can tie a small knot with the hair itself.

Special note 2: To end box braids or pixie braids(braids in which you continue down to the very end) you can burn the ends  or dip them in scalding hot water( if you have used synthetic hair)

French Braiding( Corn rowing) with Add On


The only difference between french braiding with add on and corn rowing with add on is the amount of parts you have. To start a basic french braid with add on first part the front of your natural hair into three parts and make 3 rotations of the basic french braid. Hold your fingers in this place and grab your human or synthetic hair chunk in an "x" again, stretching the hair before you begin the braid ( the amount of hair needed will vary from head to head but a good start is about two packs for human or synthetic)and gradually  feed the fake hair into the clients real hair while french braiding talking a small amount of hair at first and adding a little more as you com down the braid.

This same concept is used for corn rows . Do the exact same thing as you did for a large french braid and just scale it down to the size of the smaller parts you have created for this style. You would still start by braiding slightly the clients own hair first and feeding in the fake hair until you get to the end. Don't forget to strech the hair before you add it in and you're set to go.

These are only some fundamental braiding concepts. In my future series I will go into detail about using cornrowing methods to begin protective styles such as sew ins, and advanced rope braiding techniques of tree braiding to help everyone out there who want to understand the methods of these styles . I hope you have enjoyed my braiding series thus far. NOW GO AND BRAID AWAY!;)

By M Kyles of Kyles Natural


How to Impove Self Esteem

 How to Improve your Self Esteem in 7 Ways


Stop Blaming Your Past
Many low self esteem issues begin in childhood, often because of someone important in their life: a parent, relative, or peer may have evaluated them harshly.
It really doesn’t matter who planted the seeds of your low self-esteem;  you must take control of your destiny as a adult to recreate your self esteem future.

  Your Life Your Destiny
Find a mirror, look yourself in the eye, and say, “I am responsible for everything in my life. And only I have the power to make my life better.”
This is not an affirmation – it’s a reality check. And despite the fact that these words may seem self-defeating,

Improve Your Trouble Areas
Do you have one or two areas that send you into spirals of despair? If so, fix those areas.
Example: If you doubt your intelligence, accomplish something intellectual; if you doubt your social skills, accomplish something social; and if you doubt your physical abilities, accomplish something physical. None of these things are easy but requires constant work. The rewards in this methods reaps tremendous benefits for every inch earned in success.


Embrace Failure

Failure is your friend! As long as your failures are moving you closer to your goals, you are on the right track just don't quit.
When you fail, figure out why and be determined to learn from it. What can you do to improve your chances of success next time? Find someone who has accomplished what you are trying to do and ask for her advice.

Finish what You Start


By learning to finish what you start,  you can learn  the most important lesson of all: that you are capable.
Sometimes walking away from a problem is the smartest thing you can do, but any decision to quit must come from logic, not fear. Instead of walking away from challenges, meet them head on. Finish what you start on a consistent basis, and you will soon learn to trust yourself.

Join a Club

Find something productive that you love to do (writing, dancing, acting, programming, or whatever) and then find a group of like-minded people who are interested in learning this activity with you.
The group is your support structure and your growth foundation.

Increase Your Positive Relationships

 Does a person logically appear to be a good influence? If not, consider moving on to a new relationship.
If you surround yourself with positive, supportive people instead of deadbeats and abusers –  then you are well on your way to a better  track and having a higher self esteem.

Saturday, May 28, 2011

Natural Home Remedies for a Stomach ache:)

If you have a stomach which I'm sure most people do ( some are bigger then others lol), You have had an ache or two in your day. Most people run to the ant acid section. Be it our favorite pink bottle of stuff, or little colorful tablets we use for relief, most people are unaware of some simple things they can use right in their kitchen to ward off stomach ache woes. This article seeks to change all that with 3 easy natural home remedies for stomach ache that almost anyone can use.

Home Remedy 1

Ingredients
Unsweetened Plain yogurt.


A little known home remedy that helps for indigestion sometimes more than that pink stuff is unsweetened plain yogurt. I personally have used this home remedy and it's worked like a charm several times.:)

Home Remedy 2 

Ingredients
Pomergrante seeds
salt
pepper


Pomegranates are helpful in treating stomach ache. In a bowl of pomegranate seeds, sprinkle some salt and black pepper. Eat the seeds, while making sure to chew them properly. These fruits usually come into season around November and December and can be found at your local grocery store around then.


Home Remedy 3 

Ingredients
Mint Juice
Lime juice
Ginger juice
Black salt

One of the most effective home remedies for stomach ache would be to mix 1 tsp each of mint juice and lime juice. To it, add a few drops of ginger juice and a pinch of black salt. Drink this mixture to alleviate pain.


Now that you know how to battle a stomach ache, enjoy the fantastic feeling of doing it the natural way:)

By M Kyles of Kyles Natural


Wednesday, May 25, 2011

OHHH I lOVE IT CELEBRITY NATURALS!!! SOme Hair inspiration for ya'll:)


Anyone who's gone through with the big chop - or any big hair change, for that matter - knows how traumatic it can be. No matter how confident you were in your decision, you lose your hair and start asking yourself:

OhmybabyjesuswhatdidIdo?

Does my head look big?

Do I look like a boy? I look like a boy, don't I?

Why?!?!?!?
The big chop takes some getting used to, especially if you're used to having a lot of hair. So when you feel like wearing a hat semi-permanently or just saying "the hell with it" and getting your hair relaxed, it helps to have something to motivate you. For us, we like having hairspiration. Looking at photos of women rocking their head of curls helps remind us that hair does grow back, no matter how slow the process feels. So check out our gallery of celebrities looking fly with their natural 'dos and remember: you won't always have a TWA (teeny-weeny afro).

By BV Voices

Basic Braiding Methods Part 1


 Basic Braiding Methods Part 1 


                Basic braiding is the foundation of most mainstream hair styles. In this article I seek to inform the general public basic techniques that can help take some of the guesswork out of braiding.  I will start out with 3 basic braiding techniques that involve only braiding natural hair. The final part of this series will concern using add on. The three techniques most commonly used in braiding is the basic rope braid, French braiding, and inverted French braid.

Basic Rope Braid
For people who can’t braid a rope braid to save they’re life this article is for you. Basic rope braiding is a foundation of many hairstyles. In fact rope braids can be used to create locs as well if administered and aged appropriately. But lets begin with the basic braiding process, to create the basic braid , part hair in desired method as was explained deeply in Part 1 Twisiting Methods : The Parts .  Now split the hair into three sections. Hold two sections in your right hand ad the last section in your left. Cross the right section over the top of the middle section( while stile keeping a grip on the middle section with your right hand) and this will become your new left end . Repeat this process for the left end ( cross over to the right as this will become your new right piece). Keep crossing over the side pieces towards the middle until you reach the end of your newly created braid. Repeat this process over the entire head.  Braids DONE:) Here's a vid for all you visual people:)

French Braiding/ Cornrowing


French braiding follows the same method as basic rope braiding , but the braid is attached to the scalp. To begin a french braid first part the scalp in a method that would make the resulting braid attach to the scalp, my favorite for beginners is parting straight back cornrows ( taking the comb from the front of the scalp all the way to the back in a curved "L" fashion).  Once you have your desired part , take 3 sections like you did in creating the basic rope braid. Instead of simply braiding down you are going to braid across the new part you just made. You will cross over sections as explained earlier, but you will pick up the middle hair as you go along and incorporate it into the french braid by crossing over the top as usual. Make as many braid as you like and you are done. Note: This technique is the foundation of all sew ins which is a great protective still for natural hair. Once again a vid to demonstrate what I'm talking about.

Inverted Braiding

The only difference between a french braid and an inverted braid is you take the strands UNDER the middle section versus on top. The vid below shows in detail what I mean by that.


Ok!! you now have the basics of braiding natural hair. You should be very proud of yourself..... I am:). The next of the braiding series will cover braiding tecniqes that involve adding on hair. Be on the look out!!!:)

By M Kyles of Kyles Natural

Monday, May 23, 2011

REAL PEOPLE REAL ANSWERS EDITION 3


A DAY IN THE LIFE
“Living Naturally You”
Real People Real Answers


1.          What’s your name?

              Natasha

2.           How old are you?

              21

3.          Where are you from?

              Brooklyn, NY


4.          What is your occupation? 

              Fashion designer/ Model

5.          How would you describe yourself?

              I am  an innovative, outgoing, sociable person that is always up for new adventures in life

6.          When did you first decide to become natural?

              I decided to become natural over two years ago in January 2009

7.           If there was one word to describe your style what would it be?

              spunky

8.          Who are some people that inspire you the most?

              Tyra Banks, Janelle Monae, Beyonce, and last but not least my mother

9.          What do you want to be when you grow up?

              Fashion business mogul


10.        What advice would you give to others who wanted to go natural or live a more natural based lifestyle?

              The advice I will give others who wanted to go natural is to be patient and moisture is the key to successful hair growth. To live a more natural based lifestyle  you should stay away shampoos that have Sodium Laureth Sulfate. Sodium Laureth Sulfate  is an ingredient that can strip your natural moisture from your hair, which makes it dry. Natural hair needs moisture.  Any conditioner that is thick and creamy is great for natural hair also.

11.        What’s your favorite quote?

              " God is good"


Great Natural Bathroom Necestites Anyone can make:)

 Many store bought products for basic bathroom necessities can be made naturally from the comforts of your own home.  The two bathroom essentials we will go over in this article are , toothpaste, and mouth wash .

 If you have a mouth...odds are if you have good hygiene you are cleansing you teeth on a regular basis. What better methods to do this than you use your very own fluoride free toothpaste recipe.

Natural Toothpaste


Ingredients
Baking Soda
Coconut Oil
Glass container with lid
Optional ( pepperment oil, spearamint oil)
Small bit of Stevia for sweetness

Directions
Mix a half and half ratio of your choice of baking soda and coconut oil in a glass container . Add a small drop of peppermint or spearmint oil to this mixture. Combine a pinch of stevia to this mixture and seal jar. Now you can have a natural antibacterial based toothpaste and  fresh breathe you made all by yourself:)

Natural Mouthwash


Ingredients

 Unsweetened Cranberry juice concentrated extract ( you can purchase this from a health food store)
Water

Directions
Mix 5 teaspoons of cranberry juice extract per one half cup of distilled water. Viola!! instant effective natural mouth wash. (Note: This mouthwash is safe enough to accidentally swallow , but I don't not recommend making a habit of this).


Now if that wasn't easy enough I can't tell ya what else would be in the realm of dental hygiene. Now go and enjoy the loads of money saved by going natural the fresh breath way:)

By M Kyles of Kyles Natural


Friday, May 20, 2011

Hey Men Have Cool Hair too;)


Cute style for short hair...I LIKE!!


Never have enough on tips on loving yourself ;)

Tips to Love Yourself


  1. Turn the Negative Into Positive

    • Most people have something that they do not like about themselves, but some people will never actually do anything about it. If you have things about yourself you do not like, change them. All it takes is for a strong determination to change something. Only you have the power to change the outcomes in your life.

    Acknowledge Your Good Qualities

    • Every day, write down a minimum of five things that you love about yourself. Positive affirmation can make a big impact when it comes to learning to love yourself more. Focusing on the positive a lot of times helps diminish negatives qualities we may have.

    Eliminate Guilt and Regrets

    • Having guilt and regrets can prevent you from loving yourself fully. Concentrate on the present and realize that whatever mistakes you may have made are in your past. Everyone makes mistakes and all you can do is be a better person, not repeat the mistakes again, and love yourself for who you are.

    Focus on Fun

    • Instead of focusing on the negative, focus on enjoying your life. When you concentrate on having fun and improving yourself, you can love yourself even more before you know it. You will realize that you are a fun person that people like to be around and there is no reason for you to not love yourself.

    Improve Your Body

    • One reason people may not love themselves is that they feel that they do not have the body they always dreamed about. As an alternative for being negative about your body, replace it with being positive and being committed to changing it for the better. Eliminate junk food from your home and replace it with snacks that are good for you, such as fruits and vegetables. Find an exercise partner and stick with your routine.

Thursday, May 19, 2011

3 Recipes for a Natural Hair conditoner anyone could use :)


So just for the record, Kyles Natural hair loves natural EVERYTHING.  What would be a more fitting article than to publish one on natural conditioners as well;)?! The ones below are easy to make and effective. So lets mix some shine up people;) ENJOY!!!!

MAYO AND AVOCADO

1.Mayonnaise with avocado - Mix together one small jar of mayonnaise and half of an avocado until it is smooth. Apply the creamy mixture to your hair. Then place a shower cap on your head. Leave the mixture on your hair for twenty minutes. Shampoo. Rinse thoroughly.

EGG AND OLIVE OIL

2. Egg yolk with olive oil - Beat one egg yolk. Mix with one tablespoon of olive oil. Add in one cup of lukewarm water to dilute the mixture. Dampen your hair. Pour the egg yolk conditioner on your hair and let it set for 5 minutes. Shampoo. Rinse thoroughly. NOTE: MAKE SURE THE WATER IS COOL TO WARM SO YOU DON'T COOK THE EGG.

EGG AND YOGURT

3. Egg and yogurt - Beat one egg. Mix in the yogurt. Apply mixture on your hair for ten minutes. Shampoo. Rinse thoroughly.

Ok now that you have some great tools for some natural nourishment ....Do yo thang and show them what ya working with ;)


By M Kyles of Kyles Natural

This Blog wouldn't be right without INDIA:)


10 reasons your hair isn't growing


We’ve all heard the saying “Long hair, don’t care,” but if you really want your healthiest, longest locks, they need a little TLC. Read on to learn why your hair’s growth is at a standstill and how to get results.

1. It’s dirty.

This may seem like common sense, but dirty hair is not healthy hair. Our scalp is an extension of our skin. Imagine what your face would look like if you went 2 weeks without washing it! Hair needs to be treated to a good cleansing at least once every 7-10 days.

2. Heat Damage

Heat damage is no fun, whether it occurs on relaxed or natural hair. For natural hair using a high temperature of heat can give the same permanently bone-straight results as relaxing your hair. And, relaxed hair becomes brittle, dry and breaks easily.
“For breakage issues it’s best to see your stylist to get a trim. Severe damage may warrant a little more cutting to re-grow the hair,” says Sharrell Dorsey a natural hair expert and licensed esthetician. “Combat heat styling issues by getting regular protein treatments and deep conditioning treatments to make the hair healthier and stronger.”

3. It’s dry.

To prevent hair loss and drying, both the hair and scalp need to be moisturized. A lack of moisture causes hair to be brittle and prone to breakage. Instead of using petroleum-based products because they can clog pores, use natural oils, Dorsey says.
“Turn to nature’s best oils like olive, Vitamin E, jojoba, coconut and monoi oils that naturally hydrate the scalp, hair and even body,” she suggests.

4. It’s being pulled too tight.

Pulling hair too tightly can result in permanent hair loss such as traction alopecia, which occurs around the temple and near the ears. It can also result in acne or sores to the scalp, and that’s just not a good look. We already lose about 100 hairs daily, so there’s no need to double this number from irresponsible styling.

5. Overprocessing

Relaxers, hair dye and hair curlers, oh my! Doing too much to your hair at once is dangerous. It’s damaging to hair’s overall health and can result with immediate consequences such as chunks of hair falling out. Be sure to read instructions carefully and to do your research before trying multiple treatments at once and for proper maintenance over the long run.

6. Lack of exercise and proper nutrition

A healthy diet results in healthy hair. “Our diet plays a big part in the health of our hair,” Dorsey says. “Make sure that you are eating enough Omega-3’s like salmon and nuts and drink enough water to keep your internal health hydrated to support healthy hair.”

7. It doesn’t have time to just breathe.

Although weaves and extensions are an excellent protective style that gives you the freedom to switch up your hair’s color and texture, it’s important to remove weave every 6-8 weeks and give hair a break for at least one week.

8. It needs a trim.

Trims are not hair’s enemy! A good trim every 6 to 8 weeks prevents slit ends. Split ends are the cause of stunted growth so ridding hair of that ¼ to ½ inch will pay off.

9. Lack of protein

Chemical treatments and heat damage can diminish between 15 and 20 percent of protein. Each strand of hair is made of protein, so it definitely needs it to survive. There are weekly treatments and others that take place every 6 weeks. Consult with a stylist to figure out your regimen.

10. Using the wrong regimen

You have to use the right products for your hair texture. If you have oily, straight hair, don’t buy a shampoo for brittle curls. Use products that cater to your hair’s needs for maximum results.
-Margaret Francois of Clutch Magazine

Wednesday, May 18, 2011

TWISTING METHODS PART 3: Adding on the add on


ADDING ON THE ADD ON

            So if I really haven’t twisted you to death right now, we are going to complete our two strand twisting series with a great protective hair styling technique of twisting in add on hair to your natural hair. The most common ways to do this is to braid the add on hair in, or to twist the add on hair in. This third and final part of the twisting series seeks to give you a head start of understanding the long, daunting, yet beautiful task of twisting in add on hair to your own. Expect to take 6 -12 hours to complete (or more) full head of these. 


Braid In Method


            Ok now for all you people who don’t know how to do a basic braid I will have a in depth explanation in my soon to come “Braiding Methods” series, but for now the most common way to add on hair ironically for the two strand twist with add on is just the opposite of what a twist is ….with braiding the hair. Depending on the hair type and fullness the client may need, you typically start out with two packs of human hair, and up to 4 or 5 packs the synthetic hair of choice.
            Make sure you have cut this hair in half and separated it into small portions from the pack in equal sections of your desire for easy installation into the scalp.( or larger portion if the client wants larger twists).  Part hair in desired method and split the section you have parted into 3 pieces ( as if you were going to braid the free hair). Now here is the tricky part….take one of the portions of add on hair and stretch this portion out slightly so that you remove any blunt ends from cutting.  Place this hair in between your pointer middle and index finger right in the middle of the stretched hair. Attach the stretched hair to scalp to the three pieces of your own hair you separated earlier  and begin braiding as tightly as possible. Note: DO NOT BRAID EXCESSIVELY TIGHT AROUND THE CLIENTS EDGES THEY MAY DEVELOP TRACK BASED FEMALE BALDNESS (ALOPECIA). Continue this method throughout the rest of the head until you are done. 


TWIST IN METHOD


Instead of having three pieces of your own hair ready for add you will reduce it to two for this part. Take one section of the add on hair and stretch out the hair as described before. Take the streched hair and place it right on top of the two pieces of your own hair almost like a rope. Grab one section of the hair and add on and twist very tightly counter clock wise. Now take the other section and do the same. Keep both sections tight and twist each end around each other like you would a basic twist with pre twisted sections. Thats it!! You're done. And so am I with all this twisting stuff. I hope you enjoyed:)


By M Kyles of Kyles Natural


How to make your own lip gloss :) ENJOY!!!


Lip Gloss Recipes Made From Home
Honey Lip Gloss

1 tsp beeswax
1 tsp of honey
2 tsp canola oil

Melt beeswax in small pot over stove. Do this process slowly and make sure it does not burn. Combine ingredients in a small bowl and whisk to blend completely. Put into a heat safe container and wait until it solidifies.

Vanilla Lip Gloss
Use one tablespoon of petroleum jelly and place in small melting pot on low heat. Add 1-2 drops of vanilla extract to taste. Pour in heat safe container let set and enjoy.

Other ingredients to try:

Kool-Aid ( any flavor small amount)
Aloe Vera
Any other  Fragranced essential oil

Now that you have the tools you need go smack them lips with the shine you made all by yourself ;)

By M Kyles of Kyles Natural

HAIR ENVY ALERT!!! I LOVE IT!!


Tuesday, May 17, 2011

Ok lets bring some male energy in here DeAngelo:)


10 ways to improve your self esteem


1. Do what you love.
Everyone loves to do something, when you indulge yourself in your love you improve the way you feel about yourself. You improve your self esteem.

2. Help others out.
Nothing makes you feel better than when you unselfishly help others.

3. Acknowledge your strengths
There is no one who has no strengths. Everyone is good at something, know what your good at and give yourself a pat on the back. Do things that bring this quality out into the open. Excercise it, make it stronger.

4. Don’t put up with crap.
There is no reason you should tolerate other people being mean to you. Even if they say they are doing it with love. Make sure people know they should be nice to you and if they refuse, walk away from them.

5. Drop your negative friends.
Hang out with people who are positive and support you. It may be fun to bitch and moan but if you hang out with these types of people you will eventually become one of them. You may have noticed that people who bitch and moan are never happy.

6. Do your research
A lof of self help books are a waste of time in the sense that the only person who can change you is you. Reading even this blog post will not change you unless you get emotionally involved with the information. Which is really hard as it’s really dry and boring. Go read biographies of people you respect, people who do positvive things and attain huge success. Learn from the master not the self help guru who is always in debt.

7. Learn to accept compliments.
It’s hard to accept a compliment and not to dismiss it as being ridiculous. Someone has an opinion and it should be respected, even if you do not argree with it. If people think good about you then maybe you should too.

8. Include positivity in your life.

9. Compare yourself against yourself.
If you look at how you were yesterday and how you are today and there is an improvement then that is great. If there is no improvement then you know you need to improve your efforts. Don’t start comparing your self to other people. Saying you are poor compared to D. Trump is just going to make you miserable.

10. Don't put yourself down.
  Seeing yourself in a negative light you are only reinforcing your low self esteem.  Ask yourself, how can I improve my self esteem. The answer will always be, find one positive thing about yourself and that will do it.

Monday, May 16, 2011

Aight lets add some lauren in here ya'll


REAL PEOPLE REAL ANSWERS EDITION 2


A DAY IN THE LIFE
“Living Naturally You”
Real People Real Answers


  1. What’s your name?
Timeisha Winfield (aka UrbanGlamGyrl) 
  1.  How old are you?
31
  1. Where are you from?
Los Angeles
  1. What is your occupation?
Contract Analyst for the City by day. Budding entrepreneur by night 
  1. How would you describe yourself?
 I’m very easy going and care-free, and I enjoy the simple things in life. I enjoy spending time with my family & friends and I love meeting new people. I also enjoy traveling and learning about different cultures. I’m constantly growing & evolving as a person, but the things that remain the same are my empathy for others and my enjoyment in helping others and giving back.
  1. When did you first decide to become natural?
 Hmmm, that’s a hard question but I guess it was this year. Some people say I’ve always been natural because I’ve never had a perm but I’ve been getting my hair pressed & flat ironed since I was 13. Last April I just stopped going to the hair shop because I didn’t want to press my hair anymore. I wanted to give it a break from the heat. I felt like my hair was thinning and breaking off, and I just didn’t want to use any heat for a while. My hair was long, but I just felt like it could be a lot healthier. That turned into 8 months of not pressing or flat ironing. Then in January 2011, I was fed up with my hair, and the straight ends, the two different textures as I had a lot of new growth from my 8 months of heat-free styling and didn’t know how to handle my hair because it was long and my twist outs & braid outs just weren’t working for me anymore, so I started pressing it again and I got bangs cut in the front. I was going back to the hair salon for about 3 months, and then in late March I decided I was tired of going to hair shop, I was tired of pressing, and I still had a lot of broken off pieces and my hair just didn’t seem healthy. So in April of this year, I decided to do my version of a “big chop” and cut about half the length of my hair off (the back of my hair reached down my back to about the bottom of my bra) which got rid of most of straight ends. This was the first time I had ever cut my hair except for trims. It was shocking at first for me and then my mom and sisters were in shock as well when I showed them. But once I did it I felt relieved and I had ben telling myself it’s just hair and it will grow back. Now I am loving the versatility of my hair and I am loving taking the time to take care of my hair.
  1.  If there was one word to describe your style what would it be?
Fun!
  1. Who are some people that inspire you the most?
My grandmother & my mother of course. And people who live by example and in service to others.
  1. What do you want to be when you grow up?
An inspiration, a great friend, a great daughter, a great sister, and one day a great mother!
  1. What advice would you give to others who wanted to go natural or live a more natural based lifestyle?
I would say to do your research and figure out what being natural means to you. There is no concrete definition of “being natural”. Also know that every one’s texture is different so try not judge yourself or your hair against any one else. Be patient, and love your hair no matter what you’re curl pattern or texture is. Make sure you look at your self in the mirror every day and tell yourself that you are beautiful. Define your own definition of beauty and don’t worry about what others think of your decision because for me it was a very personal choice. You may get questions or comments that offend you at first, but you have to do what you feel is best for you, your hair, your life, and your health. In the end, people will eventually want to follow in your steps!
  1. What’s your favorite quote?
“How people treat you is their karma, how you react is yours.”


Sunday, May 15, 2011

TWISTING METHODS: Part II

Part II of How to do two strand Twists


Ok so now that we have all mastered the art of parting, we can move on to the good stuff…..Making the twists!!! All versions explained in this piece will be without the use of add on hair which will be in part 3 of making two strand twists. In this article I will explain 4 of the most commonly used twisting methods: Cross over two strand twist with out pretwisted sections, two strand twist with twisted ends, the flat twist, and finally rolling.


Basic cross over twisting ( two strand twist)

Start off with any of the parting methods listed in Part 1 of our two strand twisting series. Take one sectioned off part and split the chunk of hair in two. Cross one end of the hair over the other and continue this motion until you reach the end of your hair. Repeat this method throughout the entire head. Results will be puffier twists that are not as secure at the ends ( think about how one might style a young child’s hair with hair bows at the bottom and there you go). You can also make a gorgeous twist out with these basic twists. Simply take the twists down and don’t comb your hair out.

Cross over twisting with pre twisted sections ( Rope twisting)

This method is very similar to the basic cross over method, except this time you take the spilt chunk of hair in your part of choice and pre twist each piece in the chunk completely and separately before finishing in the basic cross over twist to make a tighter look. This sounds more complicated than what it is but it results in a neater and secure form of twisting. Once you’ve practiced for a bit on one or two you can go ahead and finish the rest of your hair and be on your way.


Flat twists ( Type 1 and 2)


Type 1
Now flat twists are started diferently than the former twisting styles , but still follow the basic concpet of the two strand twist. Instead of doing small elaborate box, triangle, or half moon parts, we will simply go to the desired place of the head ( in this example I will explain parting and twisting from the crown across the head),  and part with a rat tail comb horizontally as long as you would like it to be. Repeat another section like this for bout the width that you would like the flat twist. Split the hair in two sections at the very front and cross over twist while picking up small portions of hair as you move along the part you just made. Repeat for the desired sections and your done.

Type 2 (rolling)

Start the part for this twist in the same fashion as you did type one and simply "roll" the hair as tight as possible long the line of the part till you get to the end and secure. See video below for a visual explaination of both twistig methods.


I hope I haven't twisted you to death with this article:) Stay tuned for the final part of this series "Twisting with add on".

By M Kyles of Kyles Natural

Friday, May 13, 2011

How to make your very own natural face mask :)


So in order to cater to my motto of having a natural mind , body, spirit, and HAIR.....I wanted to share some cool things to keep our beautiful faces fresh and pampered for the day. I have a recipe for most skin types. I hope you all enjoy;)


I. ALL SKIN TYPES

ALL PURPOSE FACE MASK
Prep Time: 2 minutes
Total Time: 2 minutes
Ingredients:
  • 2 egg whites, separated from the yolk and placed in a bowl
  • 2 tablespoons of plain yogurt (I like Greek yogurt)
Preparation:
Separate the egg whites from a couple eggs and place them in a bowl. Add 2 tablespoons of yogurt (do not use flavored yogurt!). Mix them up and apply to face. Leave on face for a few minutes then rinse face in warm water, followed by a warm washcloth. 

II. Oily, Acne-Prone Skin
Banana Honey Mask
Ingredients:
  • 1 banana, preferably ripe (you can keep ripe bananas in the freezer. Let it thaw before using)
  • 1 tbsp honey
  • An orange or a lemon
Preparation:
Mix the banana and honey together.
Add a few drops of juice from an orange or a lemon.
Apply to face for 15 minutes before rinsing with a cool washcloth or a steaming warm washcloth.

Combination Skin
 Honey Rose Petal Mask
Ingredients:
  • Optional: 6 fresh rose petals
  • 2 tbsps rosewater
  • 1 tbsp natural yogurt, room temperature (not lowfat or non-fat)
  • 1 tbsp runny honey (to get honey runny, you can warm it in a microwave for a few seconds).
  •  
Preparation:
Soak rose petals, then crush them in a bowl.
Add the rosewater, yogurt and honey.
Mix well and apply to the skin.
Leave on for 10 minutes.
Rinse. 

Natural exfoliant for all skin types Mix a tiny amount of brown sugar with olive oil in your palm. Once it turns into a paste, massage into your face. Cure chapped lips by mixing brown sugar with honey and massaging into lips.

Ok now time to enjoy that fresh face of yours and wow them with that I'm beautiful on the inside and out and I KNOW IT mentality:)